Automate common cost optimizations
Blog post for Azure back to school 2023
Most of the common Azure cost optimizations are quick-fixes. These could include Public IPs that have been forgotten, VM Snapshots that have been lying around for too long or VMs that are stopped, but not deallocated. To have good cost hygiene in your environment, you could automate this using Azure Automation. In this article, I will show you how to automate common cost optimizations. Please check out Azure Back to School for more good content from the Azure Community
Note: Scripts used in this blogpost will delete resources. Be careful that you understand the consequences of running this in your own environment.
Secure your environment from accidental deletion
Before we get into looking at the script for cleaning up some cost wasting, let’s start by talking how we prevent the script from deleting resources that it shouldn’t.
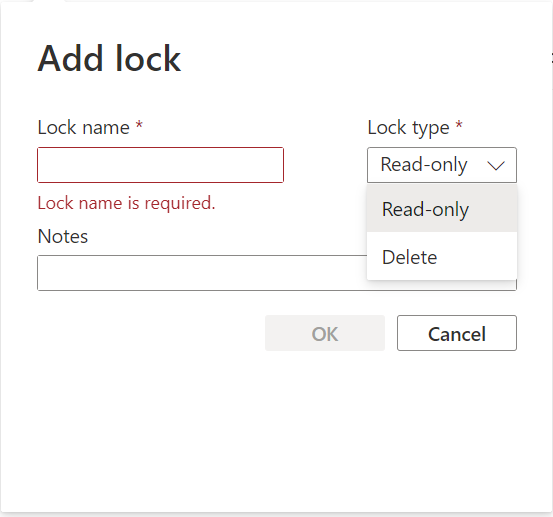
Resource locks
First, if you haven’t secured your production environment with resource locks, this would be a good place to start! Resource locks can be in 2 different modes. Read-Only and Delete. They are quite self explainatory, but Read-Only will prevent you from doing any changes to the resource and Delete will only prevent anyone from deleting a resource, either by accident or with bad intentions. Note that this will note make you 100% secure from someone with bad intentions deleting your production environment, but it will make it harder as they would need Owner role on the resource to remove the lock first.
You can find resource locks on both subscriptions, resource groups and on the resources themselves.
Reducing the blast radius
For the script we will use Azure Automation with a connected Managed Identity. This Managed Identity will require access to the resources that it is going to check and possible delete. To prevent the script from deleting something it shouldn’t, we can use least-privilige access to give the Managed Identity access to only resources that we want it to delete. And more importantly, don’t give it access to critical resources that you don’t want it to touch at all. This will be easier if you have good segregation of services in your environment, either by resource groups, subscriptions or management groups. Try to keep the access of the Managed Identity at the lowest point possible where the script will still be possible to use and access control is managable.
Exclusion tags
Last point for preventing the script from deleting something it shouldn’t is to use the exclusion tag. Tags can be put both on specific resources that you want the script to skip, or you can put it on resource group or subscriptions and force inheritence of the tag down to resources. The script will check the resources for the tag, so it will not be enough to just tag a resource group without inheritence. The exclusion tag should also be used for prevention of deleting resources that are false-positive in the checks. An example of this is a public IP that is used by a NAT gateway. Since the NAT gateway isn’t directly connecting the public IP to it’s network interface, it will look like the public IP is not connected to any resource.
To enforce either inheritence or creation of the exclusion tag, I would recommend to use Azure Policy. For inheritence I would recommend either “Inherit a tag from the resource group” or “Inherit a tag from the subscription” and for require the creation of the tag I would recommend the “Require a tag on resources”-policy. For all these policices, you only need to define the name of the tag. For this demo, I have named the exclusion tag “ExcludeCostOptimization”, but it is defined in a variable in the top of the script so you can change the name of the tag to what ever you need.
Setting up the Automation Account
Let’s start by creating an Automation Account. If you are creating the account through the portal, you should be fine with using the default settings and clicking next, next, create. If you are depolying the Automation Account through code, the only thing you need to add in addition to the required properties is the managed identity. Here is what I am using with Bicep to deploy the Automation Account:
param location string = resourceGroup().location

resource automationAccount 'Microsoft.Automation/automationAccounts@2019-06-01' = {
  name: 'CostOptimizationAutomation'
  location: location
  identity: {
    type: 'SystemAssigned'
  }
  properties: {
    sku: {
      name: 'Free'
    }
  }
}
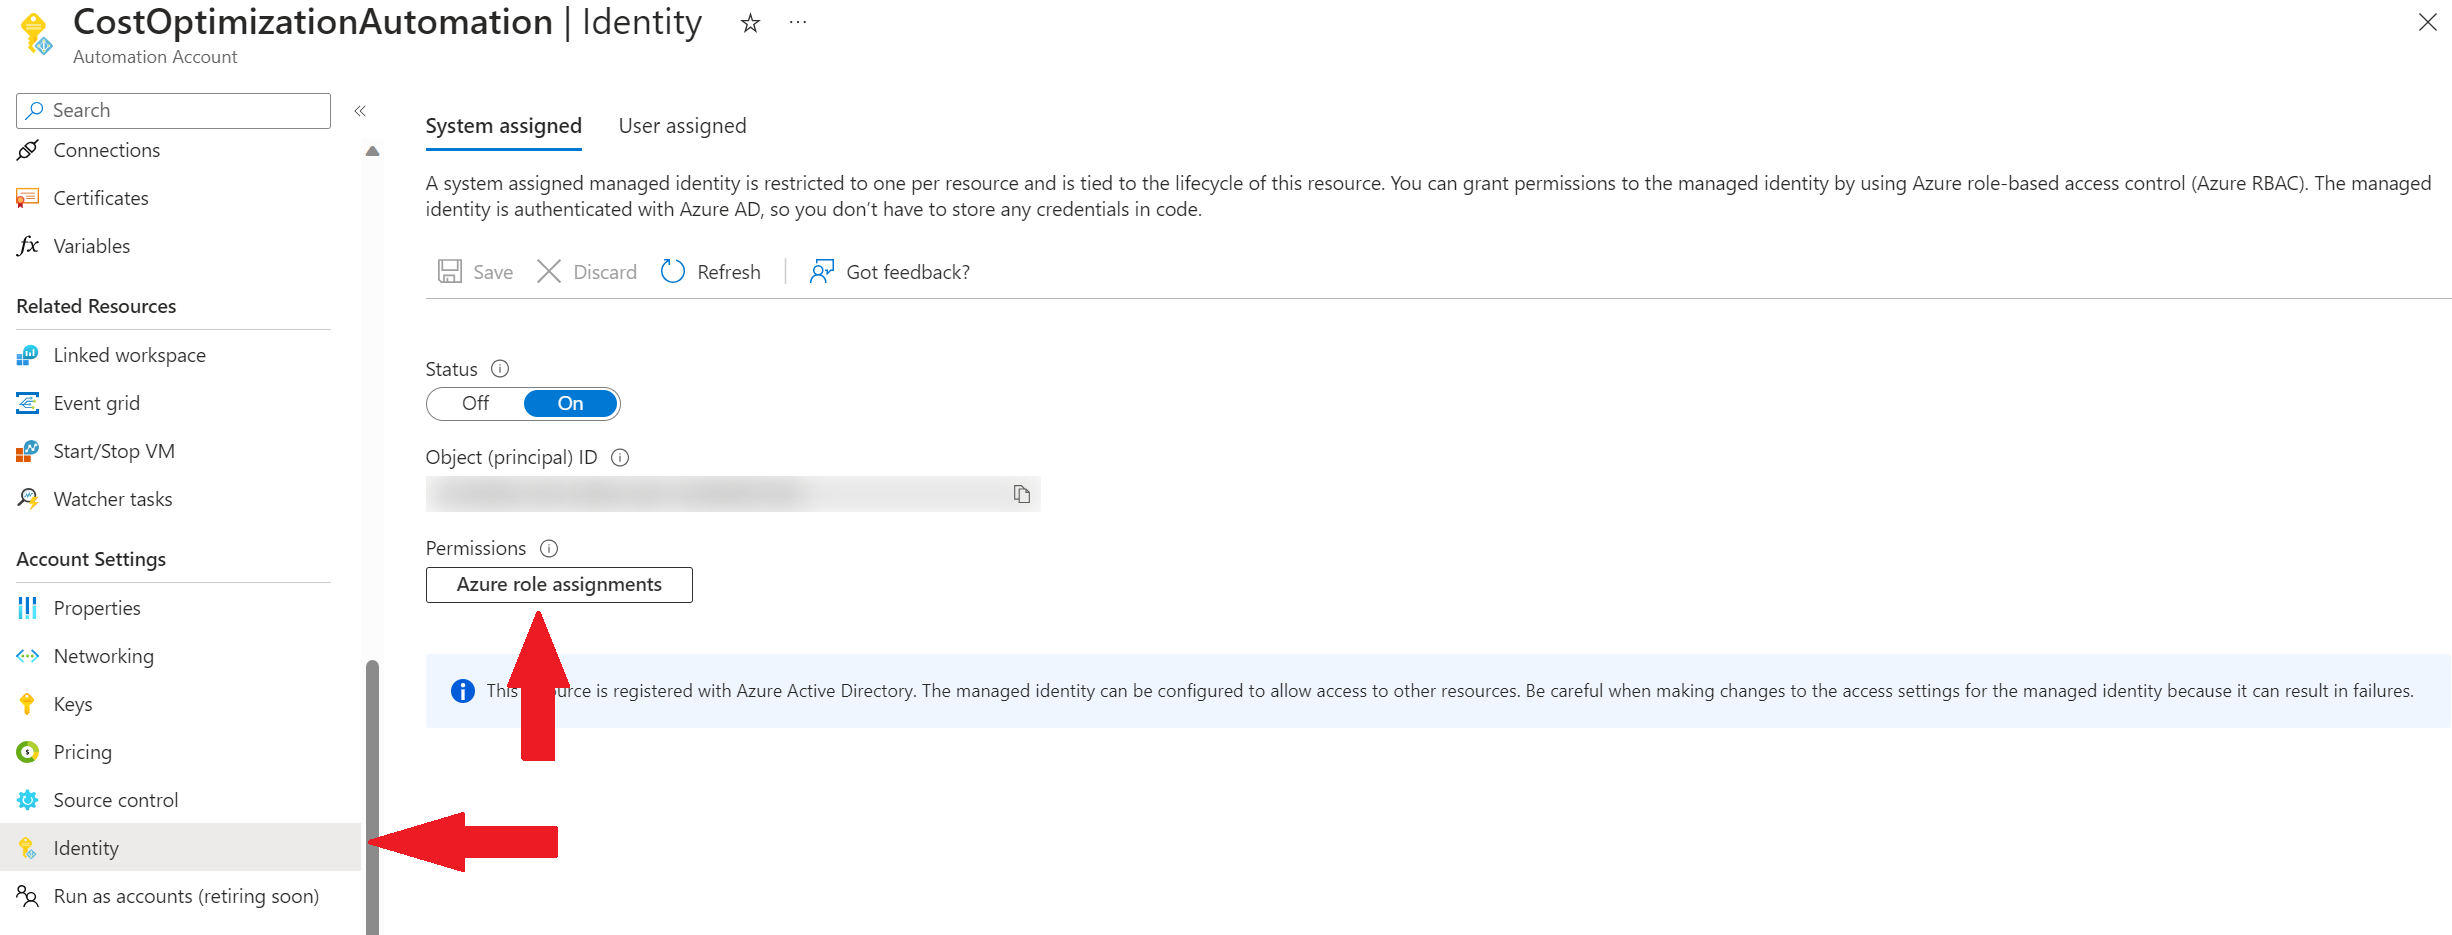
Now that you have created the Automation Account, you need to add the role assignment. This is now possible directly from the Automation Account blade, under Identity.
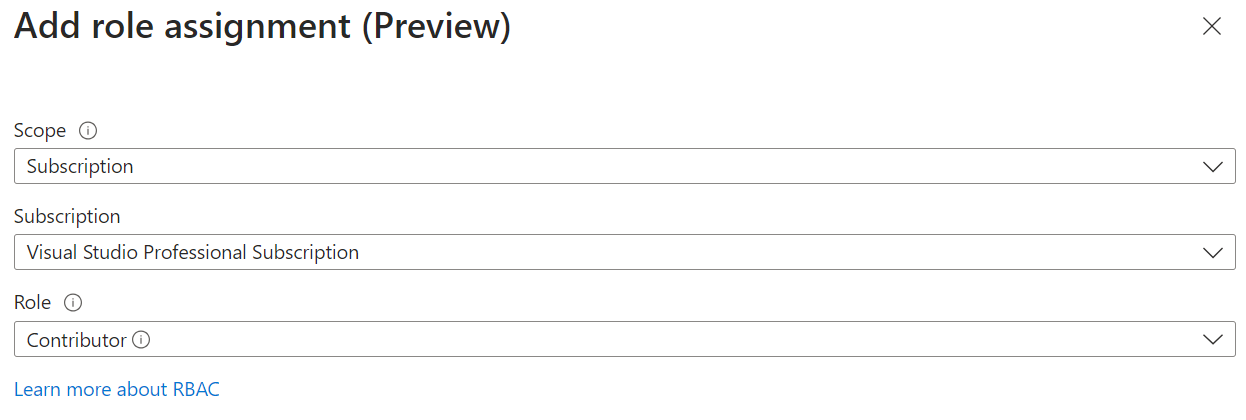
In the Azure role assignments window you can both see roles that the Managed Identity has and you can also add new roles directly. Note that adding roles from this blade is currently in preview and may not work 100% of the time.
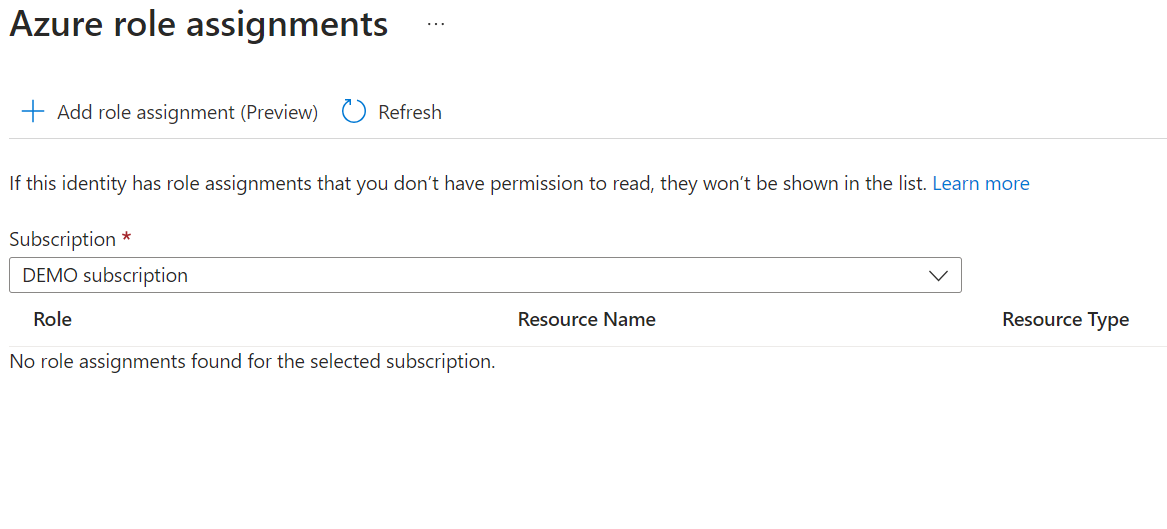
As you can see, I’m not following my own recommendation for least-privilege and that is because this is a demo and the subscription I’m giving the Managed Identity access to is my Dev subscription.
For least-privilige I would recommend these built in roles:
- Disk Snapshot Contributor
- Desktop Virtualization Power On Off Contributor
- Network Contributor
Or, even better, create a custom role that has only these permissions, as this is all the script needs:
- “Microsoft.Compute/virtualMachines/read”
- “Microsoft.Compute/virtualMachines/deallocate/action”
- “Microsoft.Compute/snapshots/delete”
- “Microsoft.Compute/snapshots/read”
- “Microsoft.Network/publicIPAdresses/read”
- “Microsoft.Network/publicIPAdresses/delete”
The Script
As mentioned, the script checks for 3 things. Public IP addresses that is not connected to any resource, snapshots older than 60 days, and VMs that are stopped but not deallocated.
All you have to do is to create a Runbook, paste in the script and connect it to a schedule so that it will run regurarly when you need it to. Note: This script is only tested on Powershell 5.1
$exclusiontag = "ExcludeCostOptimization"

Connect-AzAccount -Identity

$subscriptions = Get-AzSubscription

foreach($subscription in $subscriptions) {
    $pips = Get-AzResource -Tag @{$exclusiontag="false"} -Resourcetype "Microsoft.Network/publicIPAddresses"
    foreach($pip in $pips){
      get-azpublicIPAddress -name $pip.name | Where-Object IpConfiguration -eq $null | Remove-AzPublicIpAddress -Force
    }

    $snapshots = Get-AzResource -Tag @{$exclusiontag="false"} -Resourcetype "Microsoft.Compute/Snapshots"
    $date = (Get-Date).AddDays(-60)
    foreach($snapshot in $snapshots) {
        Get-AzSnapshot -SnapshotName $snapshot.name | Where-Object { $_.TimeCreated -lt $date } | Remove-AzSnapshot -Force
    }

    $vms = Get-AzResource -Tag @{$exclusiontag="false"} -Resourcetype "Microsoft.Compute/VirtualMachines"
    foreach($vm in $vms) {
        get-azvm -Status -Name $vm.Name | Where-Object PowerState -eq "VM stopped" | Stop-AzVM -Force
    }
}